
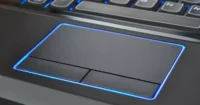
If you have a new Elan touchpad and are having trouble with getting it to work, try updating the driver. The best way to do this is with a driver update program like Driver Genius (download for FREE).
Installing the proper keyboard software can also improve your bundle’s overall stability and compatibility, and make it possible for owners to configure additional hotkeys.
Installation for ELAN I2C Filter Driver:
The ELAN I2C Filter Driver can be installed in a variety of ways. You can either manually update the drivers using a Windows utility such as Device Manager or install the package (the package provides the installation files for the keyboard software and the driver).
Another option is to download a program that automatically updates the drivers. The program can scan your computer for out-of-date or missing ones and provide you with a list of available updates.
You can then select a driver and download it. Once the driver is installed, your keyboard should work properly. You can also click “Update All” to download and install all the available drivers.
Compatibility:
The ELAN I2C Filter Driver software is compatible with the most recent versions of Windows (from 10 to 10) and also with other operating systems, such as macOS and Linux.
The program allows the user to update the existing drivers or install new ones, which can fix various issues and add some additional functions. This is especially useful when a keyboard accessory has not been properly configured, or in case the owner needs more hotkeys to control certain applications.
In order for the automatic update feature to work, the computer must be connected to the Internet and the Elantech device must be at the same time connected to it.
Otherwise, the driver will not be downloaded automatically. This can be solved by disconnecting the device and reconnecting it, then trying again to start the automatic update.
Activation:
If you are unable to activate the ELAN I2C Filter Driver on your computer, it could be due to the lack of necessary drivers. In this case, you can try using the Windows Device Manager.
You can open it by pressing the Windows key or tapping Ctrl+Alt+Del. Once the tool is launched, select the Human Interface Devices option.
After that, right-click on the I2C HID device and select Uninstall device from the context menu. After doing so, reboot your PC and let Windows automatically reinstall the driver.
You can also try using the Windows Update service to resolve the issue. This feature will check for updates and download them if available.
However, it is important to note that not all hardware components are compatible with the latest versions of Windows. Hence, you might encounter some issues even after using the service. Therefore, it is always recommended to update the operating system.
Troubleshooting:
If you’re experiencing Code 10 errors, start by checking your hardware. Look in the device manager for any items with a yellow warning icon, especially those in the Audio inputs and outputs or Universal Serial Bus controllers categories.
These are common culprits for this error. If the problem persists, move on to more advanced troubleshooting steps.
Another step is to run Windows’ hardware and devices troubleshooter. This can fix many problems with external devices, including those that don’t work or have a Code 10 error.
You can find it by clicking the search bar, typing in “device and printers,” and then selecting the tool from the list.
This is a more advanced troubleshooting technique, but it can help you solve the problem if it’s due to a buggy driver that Windows automatically updates.
To stop this from happening, you can prevent it by changing a setting in your Windows registry. To do this, head over to this guide and follow the easy steps.