
How to Install the Xerox WorkCentre 7220 and7220 Driver
In this article, I will show you how to install the WorkCentre and Xerox 7220 driver latest on your PC. Before you begin, make sure that your Operating System is compatible with your printer. After you have downloaded the necessary driver, you will need to install it on your PC.
Simply follow the instructions that come with the driver installation software. During the process, you will be asked to choose items or options. Click on the items or options that you want to install. Follow the steps listed below to finish the process.
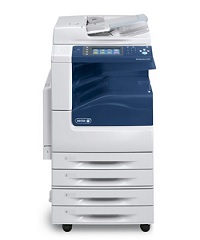
Xerox WorkCentre 7220/7225
The Xerox WorkCentre 7225 is an excellent color multifunction printer with a number of great features. Its optional Wi-Fi connectivity makes it easy to connect multiple devices without the need for wires and cabling.
It also supports Apple(r) AirPrint, which means that you don’t need to install any driver to print from your iPhone or iPad. Its Mopria certification makes printing from mobile devices even easier. And with a free device management tool, you can monitor real-time performance and resources from anywhere.
This printer also includes a large color touch screen and a number of standard workflow-optimizing capabilities. Its high-speed scanning and document storage options let you scan to USB drives, email accounts, or mobile devices.
It can also generate secure and searchable PDFs, without the need for costly add-on software. Whether you are using the WorkCentre 7225 for personal or business use, you’ll find that it will give you more freedom to work when you want and at the pace that suits your needs.
Xerox Global Print Driver
The newest model of the Xerox WorkCentre 7220/7225 printer comes with a smart start feature. Xerox Global Print Driver is an integral part of this feature. In this article, we’ll explore how to install this driver and use it to make your work easier and more efficient. You can download the driver from the manufacturer’s website by clicking on the green download button.
Using the driver is simple. It manages all Xerox printers and non-Xerox printers on a network with one easy-to-use interface. If you’re a seasoned IT manager, you’ll be grateful for the driver’s ability to simplify your tasks. With this software, you can update your printer without reinstalling your existing printer drivers.
Xerox Smart Start
If you have recently purchased a new Xerox printer, you might have noticed that the software installation is not as easy as you’d like. This article will walk you through the process of installing the Xerox Smart Start driver.
To install the software, insert the Software and Documentation CD into the appropriate drive. Once the installer starts, follow the on-screen prompts to install the software. Once the installation process is complete, you can test the functionality of your new printer.
You should also make sure you have the correct network settings for your printer. Often, printers are on a different subnet than the PC running Xerox Smart Start. In such a case, you should enter the printer’s IP address and hostname. Otherwise, Xerox Smart Start will fail to install print/scan drivers. You can try the same process with another PC in your network.
Xerox Global Print Driver for UNIX
The Xerox Global Print Driver for a UNIX system works with all printers on your network. Once installed, you must configure the driver to work with your network.
This process creates two print queues, one with the name that you were given during installation and the other with a cryptic name such as _xeroxtq1_. If you choose to print to the latter, make sure you use the name you were given during installation.
The Xerox Global Print Driver for a UNIX network relies on SNMP communication to detect the printer and display the appropriate user interface. If you do not have a supported model, the driver uses the basic model or feature set.
The Xerox Global Print Driver for UNIX also supports a wide range of customized print queue settings, including the ability to change the default configuration.