
If you own an Epson L380 printer driver or multifunction device, you may have noticed that the driver for your device is outdated.
If this is the case, you can update it manually by double-clicking the setup file and restarting your PC. Another option is to download the driver updater and let it detect and update outdated drivers for you automatically.
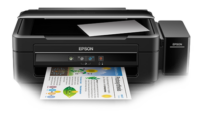
Epson L380 ink tank printer:
If you have an Epson L380 ink tank printer, you will need a printer driver to use it. These printer drivers are available for both Macintosh and Windows operating systems.
After you have downloaded the driver, you can install it on your computer. You may download a basic driver or a full-feature driver.
The Epson L380 is an excellent all-in-one printer with printing, copying, and scanning capabilities. Its ink tank system is claimed to be more efficient than a cartridge and can save you up to 80% on your printing costs.
This printer also features a standalone external scanner. The driver can be downloaded from Epson’s official website.
To update the Epson L380 printer driver, download and install the software from the manufacturer’s website. This software is free and will update any outdated drivers on your computer.
The software also comes with a 60-day money-back guarantee. The driver download should detect your printer and operating system automatically.
Epson L380 multifunction device:
The Epson L380 multifunction device is a small and lightweight printer with a variety of features, including wireless connectivity, printing in black and white, and copying and scanning.
Its 600×1200 dpi sensor delivers crisp and detailed copies, and it can print a document in 5 seconds in black and 10 seconds in color. It also works as a scanner and photocopier and refills its ink tank automatically.
The Epson L380 multifunction device is compatible with Windows XP and Vista, as well as Mac OS and Linux operating systems. The device also includes a USB 2.0 interface for easy connection to a network.
The software for the Epson L380 can be downloaded from Epson’s website, or from the installation CD included with the device. The device’s maximum print resolution is 5760×1440 dpi, so it’s an excellent choice for printing documents and photos.
The front panel of the Epson L380 is covered in an elegant matte finish. It contains four buttons, including a power switch and three switches for adjusting the printer’s settings.
These buttons can also be used to check documents on your PC. This device’s output paper tray can be retracted to one side for easy access. There is no cordless connection available, so you’ll have to plug it in using a USB 2.0 connection.
Epson L380 setup wizard:
The Epson L380 setup wizard is an easy-to-use program that guides you through the process of setting up the printer.
Once you have installed the printer software, you can access the printer’s network settings and start the setup wizard. This software helps you configure your printer and install the necessary drivers.
Before you begin the Epson L380 setup wizard, make sure the product is turned on and the USB cable is properly connected. If you experience problems installing the software, disconnect the USB cable and try again.
Also, make sure your computer meets the system requirements and close any other programs running on it. Once you have completed the prerequisites, ensure that the product is set as the default printer in the printer properties. If you still experience problems installing the software, contact your System Administrator.
Download the Epson L380 printer driver:
If you have an Epson L380 printer, you may need to download a printer driver to use it. You can find the printer driver for your printer on the manufacturer’s website or by searching for it on the Internet. Once you have downloaded the driver, install it on your Windows PC.
In order to download the correct driver, you will need to have some knowledge of the printer and some technical skills.
Windows has its own driver manager, called Device Manager, that allows you to install, uninstall, roll back, and update your printer’s driver. To open Device Manager, press the Windows key + X on the keyboard and then click on the Printer or Print Queues section.
In addition to the printer driver, you will need to install the printer software, which enables you to use your printer with the software on your computer.
You can also download the printer’s manual, which contains useful information for setup, maintenance, troubleshooting, and much more.